The slip knot is the very first step in most crochet projects. It’s the knot that goes onto your crochet hook before you start making your foundation chain.
In this beginner-friendly tutorial, I’ll show you exactly how to make a slip knot for crochet, step-by-step so you can start crocheting with confidence.
Just starting your crochet journey? Save this tutorial so you can easily come back to it later.

What You’ll Need
Before you begin, you only need a few simple supplies:
- some yarn
- a crochet hook
- a little bit of patience while your hands get used to the movement
If you’re a complete beginner, don’t worry if it feels awkward at first. The slip knot is just a small step, but once you’ve got it, you’re ready to start chaining and building your first crochet stitches.
How to Make a Slip Knot for Crochet
There are a few different ways to make a slip knot, and you may find that one method feels easier than another. In this tutorial, I’m showing you a simple beginner-friendly way to make a slip knot that you can use for most crochet projects.
Step 1: Wrap the Yarn Around Your Finger
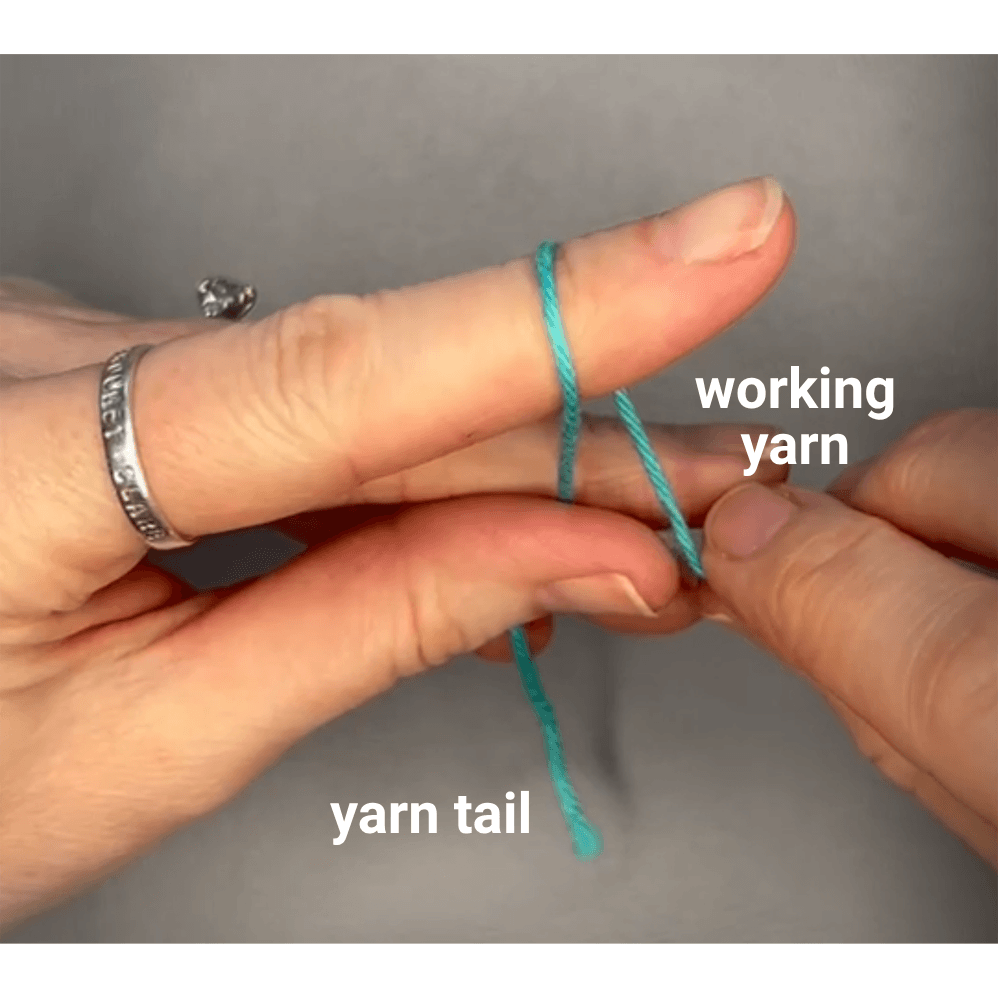
Start by holding your yarn and leaving a short tail at one end.
Take the yarn connected to the ball (the working yarn) and wrap it around your index finger once.
Step 2: Wrap the Yarn Around Your Finger Again
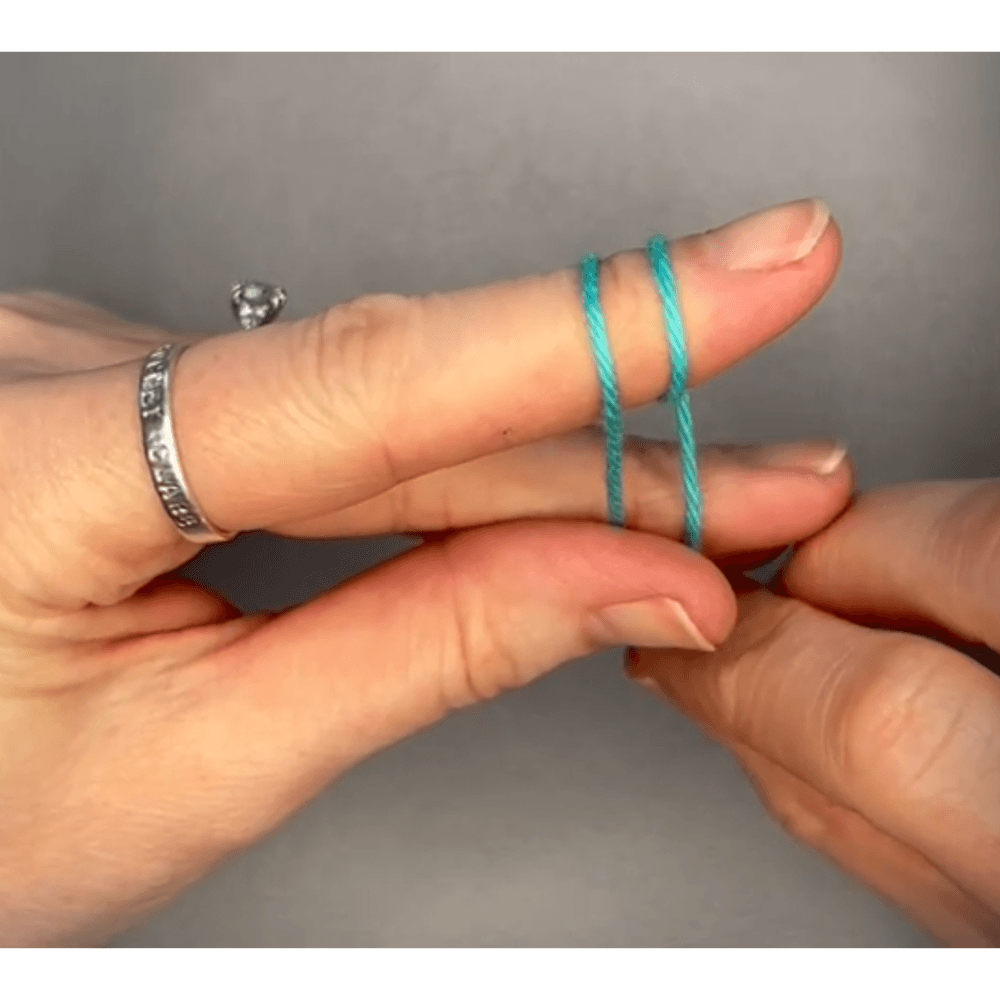
Now take the working yarn and wrap it around your finger one more time.
You should now have two strands of yarn sitting across your finger, one in front of the other.
Use your thumb to gently hold both strands in place so they don’t slip off.
Step 3: Pull the Yarn Over the Front Strand
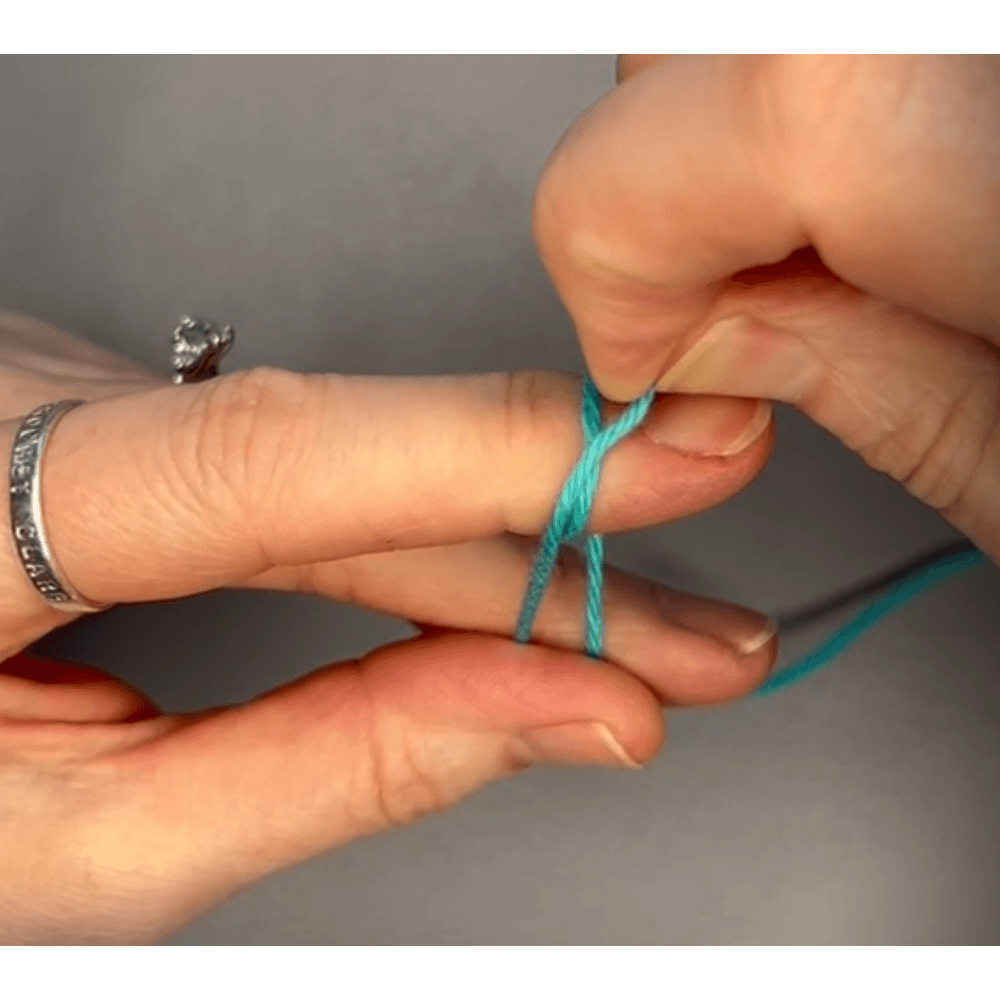
Now take the strand of yarn closest to your knuckle.
Gently pull it up and over the front strand, but keep the loop sitting on your finger.
You should start to see the strands crossing over each other to form the beginning of your knot.
Step 4: Repeat the Movement and Lift the Loop Off Your Finger
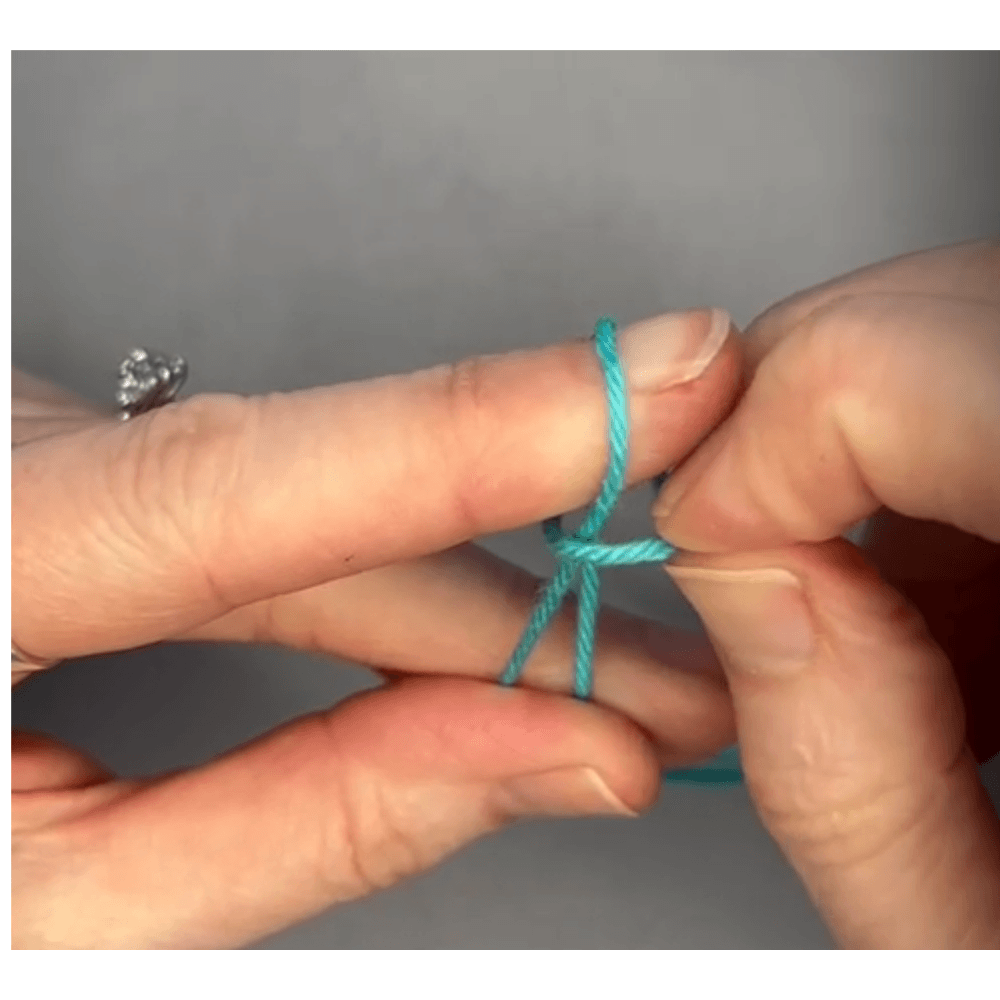
Now repeat the same movement from the previous step.
Take the strand of yarn closest to your knuckle and pull it over the front strand again.
This time, as you do this, carefully lift the loop off your finger.
You should now see the shape of your slip knot starting to form in your hands.
Step 5: Pull the Yarn to Tighten the Knot
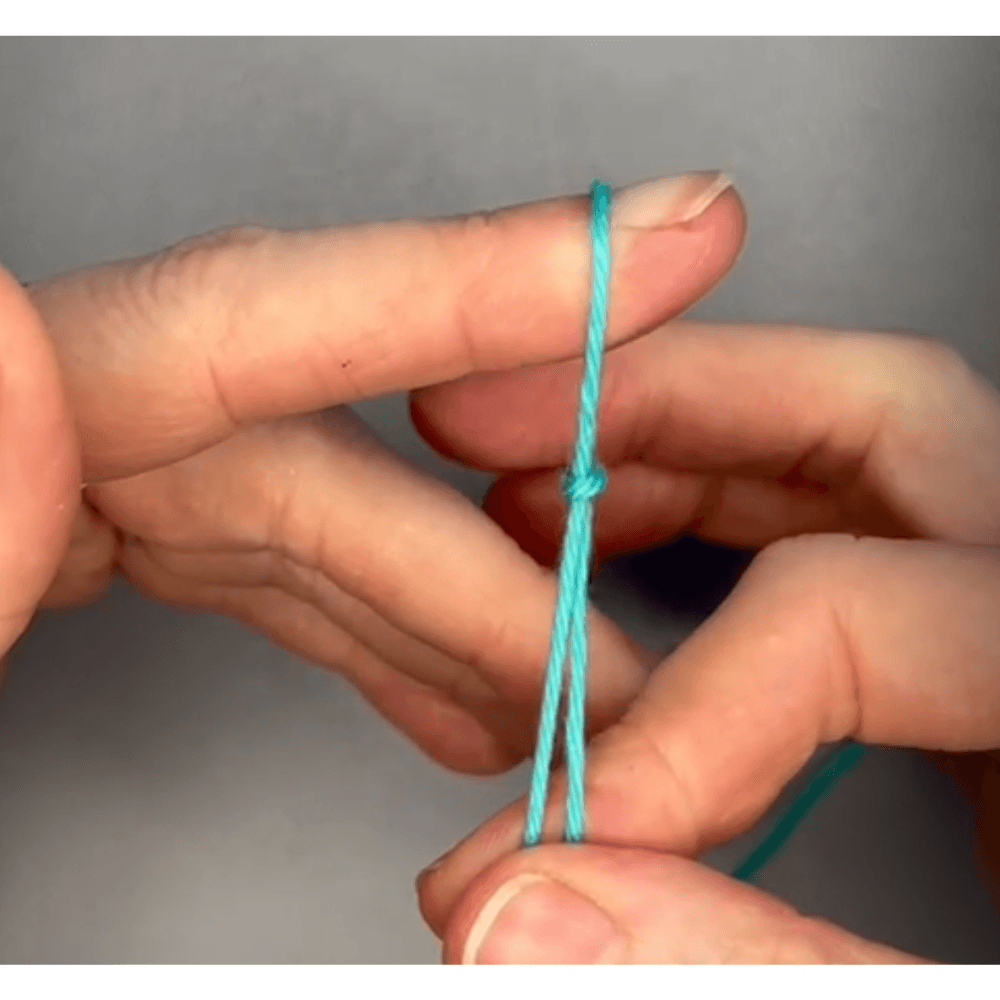
Now gently pull both the yarn tail and the working yarn at the same time.
As you do this, you will see the knot tighten and form underneath the loop.
You should now have a small loop at the top with a neat knot just below it, this is your slip knot.
Make sure the loop can still move slightly when you pull the yarn. This is what allows it to adjust on your crochet hook.
Step 6: Place the Loop onto Your Hook
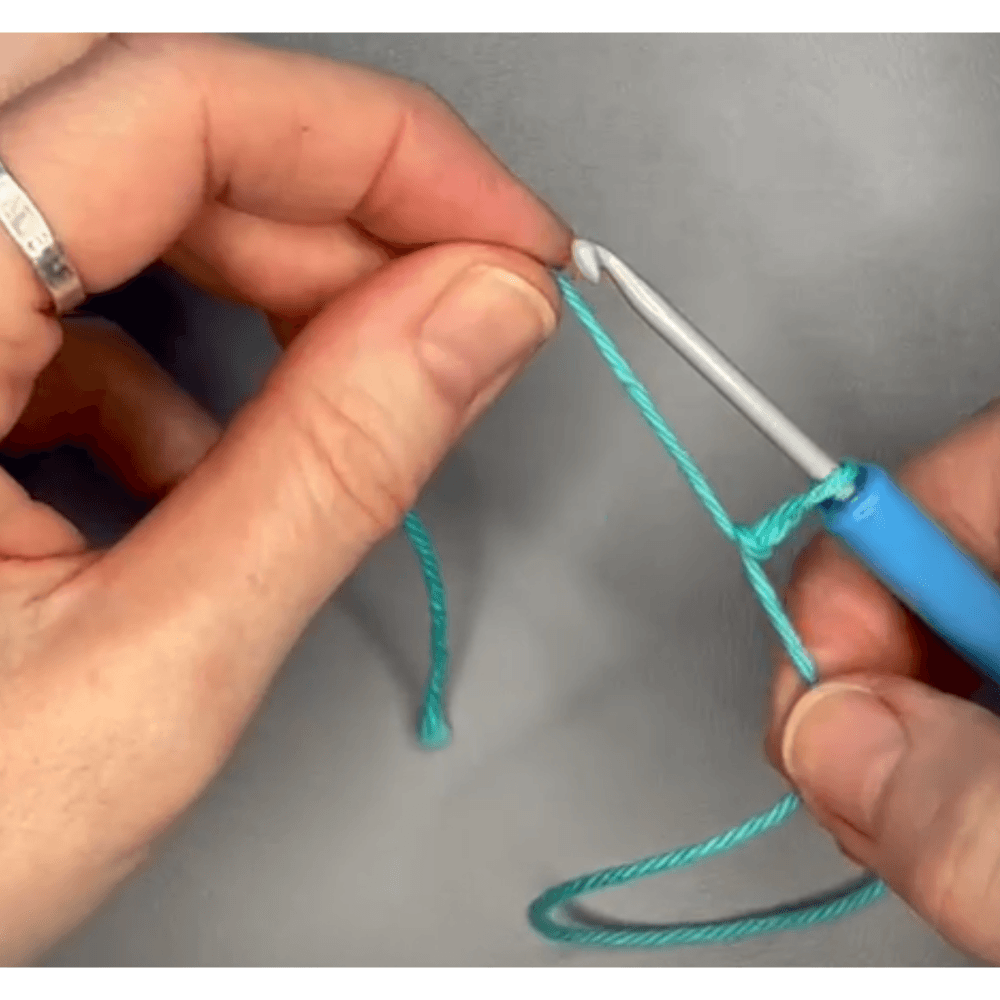
Now take your crochet hook and slide it through the loop.
Gently pull the working yarn to tighten the loop so it sits neatly on your hook.
The loop should feel snug, but not too tight, so your hook should still move easily inside it.
You are now ready to start your foundation chain.
Watch the Full Slip Knot Tutorial
🎥 Prefer to watch on YouTube?
👉 Watch the full step-by-step tutorial here
You’ve Made Your First Slip Knot 🎉
You’ve now completed your first step in crochet. Well done!
If it didn’t feel perfect the first time, don’t worry. Try it again a few times until it starts to feel more natural in your hands.
Want the printable version of this tutorial?
Inside the Crochet Clare Learning Library you'll find beginner practice guides, printable tutorials and resources that support my YouTube lessons.
Join the Learning Library to download the Slip Knot printable guide and other beginner resources.
Ready for the next step?
Now that you’ve learned how to make a slip knot, the next skill is learning how to make a foundation chain.